ASK ANA: Nail Care – How To Strengthen Nails
Hi Ana, my nails keep peeling and I don’t understand why. Is there any way to fix it? ~Victoria
ANSWER
The Frustration
One of the biggest frustrations when trying to grow long nails is the fact that they keep breaking. Broken nails make it difficult when doing nail art too.
So many people ask me how to grow their nails. Actually, our nails are always growing.
The key is to get them to stop breaking. See my “How to Stop Breaking Nails” article for more tips.
But the most important way to stop breaking brittle nails is to understand the factors that contribute to broken nails.
The damage is reversible.
You’re just a few days away from beautiful natural nails that are stronger and stop peeling.
Let’s take a look at the things that make nails brittle, break, and peel.
The Perfect Balance
Natural fingernails are a composite of keratin cells and the perfect balance of about 18 percent moisture (water) and 5 percent body oil.
- Nails with too much water are spongy and far too flexible like particle board forgotten in the rain.
- Nails that have inadequate moisture split and fracture like brightly colored fall leaves.
Important note: I’m not a nail tech and I don’t possess a science diploma. What I do have is a wonderful ability at performing thorough research and taking complicated subject areas and simplifying them so that everybody else can easily comprehend it. I simply just happen to be very geeky about nails considering that Nail Structure and Product Chemistry by Doug Schoon is my Fingernail Bible … I credit all the sciencey stuff to Mr. Schoon and the entertaining analogies are my own … yep, unquestionably geeky … so, on with the show. ~Ana
An Excellent Water Trap
A miraculous 5% of oil is all that’s required to trap an ideal amount of water (moisture) in the fingernails. But not all oils are the same.
Naturally, the most beneficial oil is the one your body makes inside the nourishing layer of the nail bed—the pinkish skin underneath your nail plate. Many people confuse the nail plate with the nail bed.
The nail bed actually contains cells similar to the inside lining within your mouth—and if you’ve ever suffered the loss of your own fingernail, then you know it’s skin that includes tons of nerve endings and hurts like the bejesus!
I know this because of my own personal experience when I was approximately eight years of age and slammed my thumb in a vehicle door.
My nail turned green after which it fell off uncovering the sensitive nail bed, which I seemed to bump everywhere…over two months of unbearable pain… but I digress….
Layers of Keratin Cells
Your nail consists of somewhere around 50 layers of dead, densely jam-packed, flattened keratin cells, that are enlarged approximately four hundred times in the image directly below. Toenails have about 100 layers.
Keratin is extremely important to the natural nail’s flexibility.
In the microscopic photo below, you can see how the nail cells link together in a random overlapping way.
Notice all the tiny holes in each cell as well as the gaps around each cell?
This is important to help you understand how easily our nails dry out and become brittle.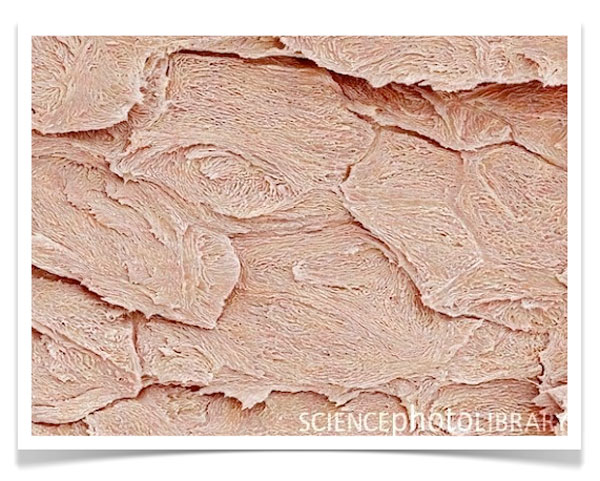
Similar To A Sponge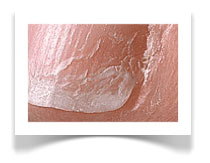
A normal fingernail plate holds almost one-third it’s own weight in water!
I’m positive you’ve observed that immediately after you’ve been in the shower or bath for too long.
Using a process called diffusion, water and body oil move in between the 50 layers of cells plus the microscopic gaps between the cells.
Water molecules are so small that they will travel through AND between the cells.
Oil molecules happen to be much bigger and can only go BETWEEN the cells.
Houston, We Have a Problem
Fingernails are exposed to 2 major solvents; water and nail polish removers.
Let’s start with water.
The average person washes their hands twelve to twenty occasions each day with harsh antibacterial soaps!
Hand washing frequency increases during cold and virus season.
Here’s the vicious cycle:
- Your fingernails absorb the water.
- Cleansing soap washes away your skin and nail’s natural oils.
- Water evaporates from the nails taking a little oil with it.
- Rinse and repeat. (pun intended 😀 )
Considering the fact that the nail’s oil was washed away, water evaporation takes away even more of the oil. Now your body’s perfect 18% water/5% oil balance is down the drain.
You are left with fingernails that are dry, stiff, and ready to snap the next time you bump them.
Polish Lovers Watch Out
 Peeling and Splitting?
Anything that dries out the nail plate also will decrease flexibleness and resilience. This includes acetone AND non-acetone polish removers.
Most of the people are convinced non-acetone removers are less dangerous and much less destructive. This is false.
Acetone is a better solution as it dissolves the lacquer faster. Less time scrubbing equates to much less drying damage to your fingernails.
Acetone and the chemicals in non-acetone remover (ethyl acetate & methyl ethyl ketone) are typically risk-free solvents when used moderately. When used only once each week, the drying out result is actually short lived and swiftly corrects itself. ~Doug Schoon, Nail Structure and Product Chemistry
Although this analogy isn’t precise, picture your own nail’s keratin layers like the paper pages of a book. Typically the paper fibers interlock firmly 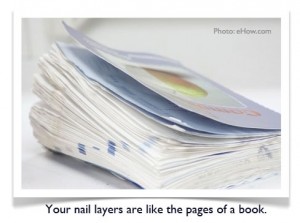 together very similarly to the keratin cells in the layers of your nails.
The spine of the book is like your proximal fold (cuticle line). When new, the book pages stack together perfectly flat. Everything lies smoothly.
So what happens as soon as the book’s pages become soaked?
The water gets absorbed into the paper fibers, they relax, and spread out.
What happens once the pages dry?
All of the paper’s fibers continue to remain spread out so the pages dry distorted. The layers of the pages don’t lie smoothly together any longer.
Our Fingernails Are Tougher Than a Book
However, you could possibly be thinking, “Ana, my nails get wet again and again so this small book comparison isn’t right.”
And you’re correct … up to a point. That point is when your brittle fingernails begin peeling and cracking.
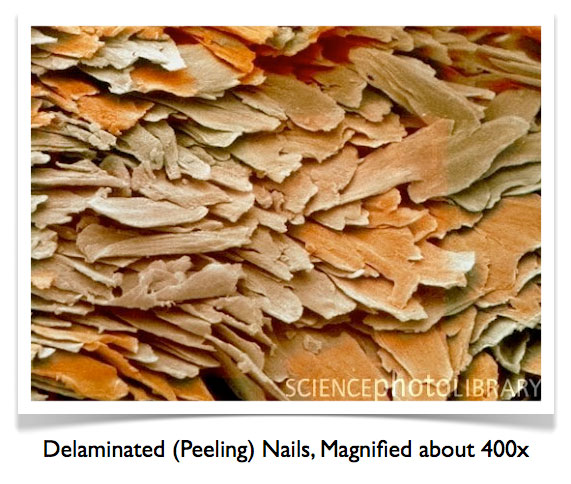
Too much exposure to water over a period of time weakens the nail plate and causes all kinds of damage. The photo below is what peeling nails look like under an electron microscope.
It’s a little different when compared to the nice, smooth nail photo towards the top of this article, right?
What’s The Answer?
Actually … considering the fact that I can’t advise eliminating hand washing, your only other option is to get the oil back in your fingernails.
“Oils have a plasticizing effect and can noticeably increase flexibility of the plate, especially with dry, brittle nails. How? Oils can increase the amount of moisture in the nail plate. When applied and absorbed into the nail surface, oils will slow down the passage of water through the nail plate. Oils block and temporarily seal the moisture channels. This can be especially useful for very dry nail plates. Oils slow water evaporation from the nail plate, which increases moisture content. The result is less brittle, more flexible nail plates.” ~Doug Schoon, Nail Structure and Product Chemistry
Remember when I mentioned not all oils are created the same? A lot of people have applied avocado, canola, mineral, or olive oil on their fingernails with no success.
The reason for this is that many oil molecules are very large. And some oils, like mineral oil, can’t absorb into the keratin layers at all.
Other larger molecule oils usually get washed away before they can penetrate.
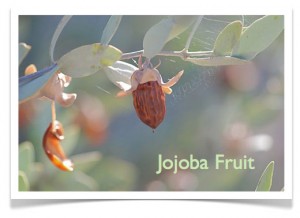 Jojoba’s History
Despite the fact that jojoba wax ester has been around since 1822, it obtained notoriety in 1971 when the United States stopped the import of sperm whale oil which was implemented extensively in the cosmetics industry.
The market sector ended up being compelled to look for a replacement and jojoba was determined to be most suitable.
Without becoming far too geeky on you, the vast majority of vegetable seed oils are triglycerides. Jojoba wax ester consists of long-chain fatty acids and fatty alcohols with no side branching. This particular chemical arrangement accords jojoba special attributes unparalleled in the plant kingdom. (Hort.Purdue.Edu)
In What Way It’s Distinct
Jojoba wax ester is the same molecular size as the human body’s particular oil, sebum. For the reason that jojoba is made up of wax esters and fatty acids which are comparable to human sebum, it’s a favorite ingredient in cosmetics and skin products. (eHow.com)
The Reason Why It Really Works
“Oils are absorbed into the nail plate to keep it flexible, but much more slowly than water. Similar to how oils are absorbed a lot more slowly right into the nail plate, it is also alot more difficult for the oils to escape. Therefore, oils stay in the plate for a very long time and can exert a dramatic long-term influence on the durability of the natural nail plate.” ~Doug Schoon, Nail Structure and Product Chemistry
What to Look for in a Nail Oil Blend
As you can probably guess by now, your nail oil MUST have jojoba wax ester, and ideally at the start of the ingredient list.
But why did I say “blend”, instead of just pure jojoba?
When different ingredients are combined they behave differently than each individual component.
Can I Have My Cake and Eat It Too?
As a simplistic example, let’s look at the ingredients in a cake.
Eggs, vegetable oil, flour mixture, etc. Or if you’re lazy like me—cake mix!
Once you mix those ingredients you have a batter. You no longer have the separate ingredients.
Then when you bake it, you have a cake. You no longer have batter.
A high-quality hydrating oil blend will yield far superior results than jojoba alone.
My mother and my best friend tried jojoba and reported back to me that it didn’t work like the Simply Pure™ oil blend I created in my kitchen in 2012.
Since starting our business Bliss Kiss when my husband was laid off, we’ve had hundreds of customers give the same report.
Why? — Synergy.
How To Apply Nail Oil Guidelines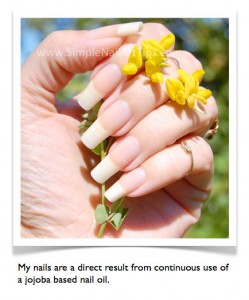
The Initial Three (3) Days
When I started using my Simply Pure™ hydrating oil, I noticed that my nails seemed to keep soaking it up like a sponge.
I just kept reapplying it until the absorption slowed down. That took three days. As a result, I created the directions for a three-day hydration treatment.
During the first three days, you will use quite a bit of oil.
After that, you’ll apply it only as needed. For me, that’s about 4 times per day.
- Clear away all nail lacquer
- Proceed with the basic daily application instructions below. As soon as you’re finished, your fingernails will feel a tad slippery. You do not want to be greasy.
- Once in a while throughout the next hour or two, rub the surface oil into your nails
- Whenever you do this your fingernails will feel less oily. When you feel the oil has become absorbed, reapply
- Repeat step 4 for your first 72 hours.
Basic Daily Application
Two Times (2x) Daily or more
- Uncap the pen, twist end until you see oil inside the bristles
- Brush oil on your nail, cuticle, sidewalls and under your free edge of the nail
- Recap pen
- Using your fingers, massage the oil directly into the fingernails and fingers up to the knuckle closest to your nail.
- Spend a bit of time massaging the matrix (right behind the cuticle) * This improves the flow of blood to where your nail is created so they really will be stronger and healthier.
- Carry on using this oil application with lacquer manicures, acrylic or gel manicures. Just like your fingernails are not solid, neither is lacquer, acrylic monomers or gel. Jojoba wax ester is absorbed into each one of these products whilst keeping them a lot more flexible as they aren’t dehydrating.
Don’t Have Three Days?
In 2017, one of my best friends told me about her results doing an intensive hydration treatment with Simply Pure™ hydrating oil, Simply Sealed™ lotion stick, and nitrile gloves.
When I tried it, I was blown away by the amount of oil my nails had absorbed.
I love that it doesn’t take 3 days to make my nails stronger between manicures anymore.
And if I don’t have time for overnight? I just do a mini-hydration treatment while watching a movie.
Polishing After Nail Oil
Using 91% rubbing alcohol or pure acetone, swiftly cleanse the surface of your own nail. Doing this will remove the oil sitting on top of your own nail for increased adhesion of your own lacquer. Polish your nails by using your chosen base coat.
Base Coat: Essential!
Base coats include a high percentage of a resin which actually improves nail plate adhesion and reduces yellow staining.
Topcoats usually have high amounts of nitrocellulose to increase wear by covering the polish by creating a preventative shield in addition to maximizing high gloss.
Base coats and top coats are definitely not interchangeable. Any polish that claims to be a base coat and top coat will be a disappointment and lead to early polish chipping.
Taking off Nail Polish
Consider Acetone
Considering the fact that acetone works quicker than the non-acetone ingredients, which in turn causes you to rub and scrub a lot more, it’s actually more effective to begin using acetone to take off your nail polish.
Use my Soak & Swipe™ method and manicure clips to remove your polish without scrubbing. Your body heat warms the acetone and makes it 50% more effective.
Moisturize
Do an intensive hydration treatment for a few hours to help your nails reabsorb some oil. I have more details in my Intensive Hydration article.
The Result?
With proper nail care, your brittle fingernails will be a thing of the past and you’ll know how to maintain beautiful long nails!
And if you like doing nail art, it’s a joy to be able to wear your creations for 7-10 days.
Next Steps For Your Nails
Get Naked! Well, at least get your fingernails naked. I know, it can be scary to even think of leaving the house without your nails painted. Especially if your nails are stained like mine from my favorite dark polishes.
Remember that any respectable nail artist will probably have stained nails. So, flaunt those naked nails with pride!
The “Get Naked” Challenge is really the best way to hydrate your nails so you can get those gorgeous long, strong nails you’ve always dreamed of.
This article has given me a whole new different out look on nail care. I love doing nail art and always want to make sure my nails look healthy but lately my nails have been peeling like crazy! I work with money everyday which means I am constantly washing my hands! So which is less harsh on your nails: Washing hands with soap and water or using a waterless hand sanitizer? Thank you for this amazing article! You’re pretty much my nail saviour! Lol
Thea, thank you so much for your question! Working with paper is extremely drying to the skin and nails. The answer is both…waterless hand sanitizer is mostly isopropyl alcohol—very drying. You have two options:
1. ALWAYS put your favorite lotion on your hands after you wash them or…
2. Use an Anti-bacterial lotion. Bath and BodyWorks has HandiBac in several of their popular scents. Here’s a link to my favorite: http://tinyurl.com/VanillaHandiBac
#2 would most likely be my choice while working with money and then washing and lotion after using the restroom. Hope this helps! Come visit us on Facebook! ~Ana
Thank you so much for the info Ana. It really helped me a lot! Just another q, I have all the ingredients for the Pure nail oil except Vit A oil…this sucker is a pain to find! Is it dead essential in the cuticle oil recipe? Is there an alternative? I would love to order the Pure oil but the exchange rate…ouch! lol
Thank you once again Ana! You are awesome!
You’re welcome Thea! Vitamin A oil is really hard to find. You can use Vitamin A capsules… Just poke a hole in it and squeeze the oil out.
I have my best sale of the year going on right now on http://www.facebook.com/SimpleNailArtTips ending on 1/19/13.
I’m also hosting a 3 Day “Let’s Get Naked” challenge and contest for women who want to do the Initial Hydration Treatment. Come join the fun!
Once I’ve completed the initial 3 day treatment, do you recommend cutting or filing to remove the peeling ends of my nails? What I have been doing is patching/reinforcing those areas with nail glue and silk wraps just on the tears and peeling parts, trimming when my nails get too long, and then filing them smooth.
Also, I’ve seen so much about only filing one direction, filing each side towards the center, back-and-forth filing being OK as long as it’s done gently…I don’t know what to believe. I’ve been using foam files of no lower grade than 240, but I did just buy a crystal file from Sally Beauty Supply yesterday. Help, please!
Jenna, thank you for your great questions. You have two choices for dealing with the peeling ends of your nails.
1. File them down with your 240 and then finish the edge with the crystal file.
2. Buff the top of the peeling edge if you have nail fibers sticking up so they would snag on your hair or clothes. And then keep clear nail polish on your nails to seal the peeling edge. Wrap the polish completely around the tip to the underside. Add a new coat every day for 7 days. Remove and start the process again.
Continue oiling your nails as often as you wish since the oil does penetrate the lacquer.
Filing
It is best to file one direction at a time. It just creates a smoother edge because you’re not forcing the nail fibers to shift back and forth (which can lead to more peeling). It takes longer to file this way but it’s better for your nails.
It’s also best not to file the sides of your nails unless you have an extreme C curve where the edges start to curl under. The less you file the sides, the stronger your nails will be. So for the most part you are filing just the free edge. It’s perfectly fine to do 5 strokes in one direction and then 5 strokes the opposite direction. Your crystal file with be great for doing the final file to blend the nail fibers together so you don’t have all those frayed shavings. Kayla Shevonne has done a great tutorial http://www.kaylashevonne.com/2012/05/manicuring-101-beveling.html
Hope that helps! ~Ana
Thanks, Ana! Your answers were very helpful. One more quick question: To remove length quickly, is cutting with nail clippers OK, or a big “don’t”?
It is ok to cut with clippers. I’ve heard some people recommending to cut them only when they are wet, but I personally don’t.
My nails have such a sharp curve that as soon as I clip 1/2 way, the rest of the nail snaps cleanly. This wouldn’t happen if they were wet. And as you can tell from this article, I AM NOT a big fan of soaking nails in water.
When I do clip my nails, I don’t clip straight across. I make my first clip at an angle toward the opposite corner tip of my nail. This way, if it snaps free, it doesn’t make my nails shorter than I had intended…because as you know, nails never break perfectly straight.
The best thing to do is clip them longer than you want and then file to finish. Then when you have them the length you like, every week file each nail 20 strokes. This should remove about 1 week’s worth of growth. ~Ana
Again, thank you so much! This was really helpful!
Great article! what about almond oil? I apply it on my whole hands including nails and it seems to be good for them as wel but I will buy jojoba oil as well 😀 Thank you for very comprehensive explanation!
Hi Lucy!
I just love your nail art! Thanks for dropping by.
Almond oil is fabulous! I’m just allergic to it so I don’t use it in my Pure Nail Oil. Jojoba oil mixed with two other oils is a great combo for your skin and nails. Jojoba is very expensive and it doesn’t need to be used straight to absorb into your nails. I have my recipe on http://www.SimpleNailArtTips.com/oil if you’re interested in mixing your own nail oil. (It’s just very messy 🙂 ~Ana
Update: I no longer have my recipe online. ~Ana
I read a lot about nail care because my nails were splitting like crazy. I tried a lot of things and now my nails are a lot better but not perfect. I found your article through a link from Lucy’s Stash and I’m so happy I found it because I searched a bit about how nails look closely (very closely lol) and I found it by hazard.
Very nice article 🙂
I’m so happy you enjoyed the article! That’s why I write.
Thank you so much for this information! My nails are as hard as rocks but peel. I am going to try your plan and see if it helps. I work with paper all day long and it is very drying to hands and nails. I look forward to improved nail health !
You are very welcome Sharon.
Working with paper is one of the worst occupations. It’s amazing how something so simple can be so drying. Please keep us up to date on your progress on my FB page http://www.facebook.com/SimpleNailArtTips
Please walk me through removing acrylics, my nails are extremely thin. And then what? I am reading 3 days of intensive oil treatments but my nails are actually like tissue paper and split down the center to the quick and are very painful which is why I chose acrylics. No more pain and beautiful nails. But now I am experiencing acrylics lifting and have been advised to remove them for three months, how about forever? Your I put will be appreciated.
Hi, I’ve been using your oil since may and I am just seeing some improvement in my nail, I am a floral manager and it is very hard on my nails, and of course I keep forgetting to put the gloves on. Is this normal for my nails to take this long to improve? I have always had very strong nails, maybe to strong but they do peel, but I am sticking with your oil and just being very patient every day, if you have any other suggestions please I would love to hear them.